Ready to record a Zoom meeting? All it takes is a click of the "Record" button on your toolbar once the session is live. From there, you'll have two main choices: save the file right onto your computer (local recording) or store it in your online Zoom account (cloud recording), which is a feature for paid plans.
Knowing the difference between these two isn't just a technical detail—it’s the key to making sure your recordings are easy to manage and share later on.
Why Bother Recording Your Zoom Meetings?
In our remote and hybrid work world, recording a Zoom meeting has gone from a nice-to-have feature to an essential productivity tool. The proof is in the numbers. Zoom went from 10 million daily meeting participants in December 2019 to a staggering 300 million by April 2020. That's a 2,900% jump in just four months. You can read more about Zoom's incredible growth to really grasp the scale of this shift.
When you record a meeting, you're creating a permanent, accessible record of what was discussed, decided, and assigned. This ensures valuable information doesn't just vanish into thin air the moment the call ends.
The Real-World Payoffs of Hitting 'Record'
Catching Up Is Easy: Team members in different time zones or those who were double-booked can watch the meeting on their own schedule. No more FOMO on key decisions.
A Perfect Memory: Let’s be honest, nobody’s notes are perfect. A recording is your source of truth for revisiting complex points, confirming who agreed to what, and clarifying action items.
Create Training Gold: That brilliant product demo or a smooth client onboarding session? It can be repurposed into a go-to training video for new hires, creating consistent and scalable learning materials.
Choosing between local and cloud recording often comes down to one simple question: who needs to see this? This little flowchart breaks it down perfectly.
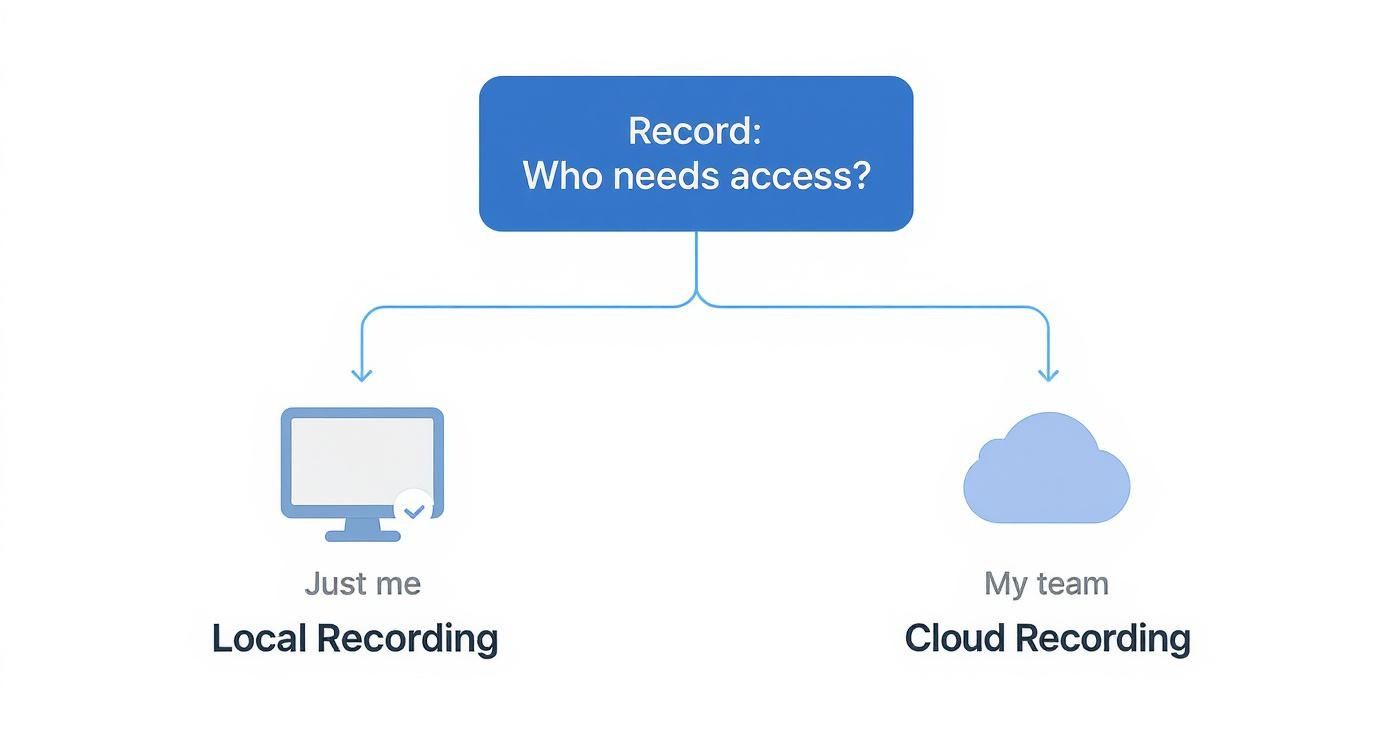
As you can see, it's really about your end goal. Is this for your eyes only, or is it a team asset?
Pro Tip: Think about your audience before you press record. Local recordings are fantastic for personal review or a quick archive. But for any project involving teamwork, cloud recording is the clear winner, giving everyone instant access without you having to upload and share massive files. This one decision shapes your entire post-meeting workflow.
Recording Zoom Meetings on Your Desktop
The most reliable way to record a Zoom meeting is right from your Mac or PC. The desktop app gives you the most control, whether you're saving the recording straight to your computer (local recording) or to your paid Zoom account in the cloud.
Everything you need is right there in the main toolbar at the bottom of your meeting window. When you're ready to go, it's just a click away.
Kicking Off Your First Recording
Once your meeting is up and running, look for the "Record" button on that bottom toolbar. If you're on a paid plan, Zoom will ask if you want to "Record on this Computer" or "Record to the Cloud." If you're using a free account, it’ll just start recording to your computer automatically.
The moment you hit record, a small "Recording" indicator will pop up in the top-left corner of the screen. This is a heads-up for everyone in the meeting that the session is being captured. You'll see pause and stop controls right there, as well as on the main toolbar at the bottom.
A quick pro-tip: Don't forget about the pause button. It's perfect for when the conversation gets sidetracked or you need to take a quick break. Just pause the recording to keep your final video tight and on-topic, then hit "Resume Recording" when you're back.
Choosing Your Recording Layout
What your final video looks like matters. Before you even think about hitting record, you should decide on the layout. Zoom offers a few different views, and each one is suited for a different kind of meeting.
Active Speaker View: This is your go-to for presentations or interviews. It automatically puts the person who's currently talking front and center, which is great for keeping the focus on a single speaker.
Gallery View: You might know this as the "Brady Bunch" view. It shows everyone in a grid, which is perfect for team meetings or brainstorming sessions where you want to see everyone's reactions and body language.
You can also record a shared screen with a small thumbnail of the active speaker. This is hands-down the best option for software tutorials, training webinars, or any time you're walking a group through a document.
Finding Your Files After the Meeting
So, the meeting's over. Now what? The first question everyone asks is, "Where did my recording go?" As soon as you end the meeting, Zoom gets to work converting the session into standard video and audio files. Be patient—this can take a few minutes, especially for longer meetings.
Once it's finished, Zoom will usually open the folder containing your files automatically. By default, these local recordings live in a dedicated "Zoom" folder inside your computer's Documents directory.
Here’s a look at the familiar Zoom interface where you'll find that record button.
The layout is clean and simple, keeping critical functions like mute, video, and recording easily accessible.
If that folder doesn't pop up for some reason, don't worry. Just navigate to your Documents folder, find the "Zoom" subfolder, and you'll see a list of recordings, each organized in its own folder named with the meeting's date, time, and topic. Inside, you'll typically find three things:
An MP4 file: The full video recording.
An M4A file: An audio-only version, great for podcasts or simple reviews.
A TXT file: A log of all the in-meeting chat messages.
I can't stress this enough: get into the habit of renaming these folders immediately. A simple convention like "2024-05-20_Project-Kickoff" will save you a world of headache later on.
How to Record a Zoom Meeting on Mobile
Need to record a Zoom call while you're away from your desk? It's definitely possible, but there's one big catch you need to know about right away.
The mobile app—for both iOS and Android—doesn't do local recording. That means you can't save the video file directly to your phone. Period. The only option is cloud recording, which is a feature reserved for paid Zoom accounts.
This isn't just an arbitrary rule. Think about it: video files are huge, and the processing required to create one would absolutely crush your phone's battery and performance. By using cloud recording, Zoom's servers do all the heavy lifting for you.
Starting Your Mobile Cloud Recording
As long as you’re the host and have a Pro, Business, or Enterprise plan, kicking off a recording from your phone is simple.
Once you’re in the meeting, just tap the screen to show the controls. Look for the “More” button, which usually looks like three dots ... in the bottom-right corner.
Tapping it brings up a menu. From there, select “Record to the Cloud” (or on some versions, just "Record"). You'll see a small "Recording..." label pop up, letting you know it's working. If you need to take a break, you can head back to that same "More" menu to pause or stop.
Crucial Reminder: Mobile recording lives and dies by your cloud storage quota. Before a critical meeting, always log into the Zoom web portal to check how much space you have left. You don't want to get cut off halfway through.
Finding and Managing Your Recordings
When you end the call, Zoom gets to work processing your video. You’ll get an email as soon as the recording is ready to view, share, or download. For shorter meetings, this is pretty fast, but longer sessions can take a bit more time.
Since the files aren't stored on your device, you have to manage them through the Zoom web portal. While you can do this from your phone's browser, I find it’s much easier on a computer.
Here's where to find your files:
Open a web browser and sign in to your Zoom account.
In the navigation menu on the left, click on “Recordings.”
You'll land on a dashboard listing all your cloud recordings, ready to go.
From here, you can grab a shareable link, download the MP4 file, or even password-protect it. Keep in mind that a stable internet connection is key. If your Wi-Fi or mobile data is choppy during the meeting, the recording data might not upload correctly, which can lead to a corrupted file.
Understanding Recording Permissions and Controls
If you've ever tried to record a Zoom meeting and hit a wall with the "Please request recording permission from the meeting host" message, you're not alone. This isn't a glitch—it's Zoom's built-in permission system, and it’s there for a good reason.
By default, only the meeting host can start a recording. This puts one person firmly in control, preventing a chaotic situation where multiple people are making their own separate recordings of the same meeting. But that doesn't mean the host has to do everything themselves.
For the Meeting Host
As the host, you’re in the driver's seat. You can give recording privileges to any participant, which is a lifesaver in large meetings or webinars when you need to focus on presenting. This feature is especially critical for webinars, a format that saw over 45 billion minutes hosted on Zoom in just one quarter of 2021. You can dive deeper into these numbers in this Zoom user statistics report.
To hand over recording controls during a live meeting, it’s simple:
First, open the Participants panel from your toolbar.
Find the person you want to grant access to and hover over their name.
Click More, and then select Allow Record.
That's it. They'll get a notification that they can now record, and the "Record" button will light up for them. You can take back this permission at any point by following the same steps.
Pro Tip: Assign a co-host before your meeting even begins. If your internet connection drops unexpectedly, your co-host can keep the meeting—and the recording—going without a hitch.
For Participants Requesting to Record
If you aren't the host, you'll have to ask for the green light. When you click the "Record" button, Zoom will automatically prompt you to send a formal request to the host. They'll get a pop-up on their screen where they can approve or deny it instantly.
It's always a good idea to give the host a heads-up first, either verbally or in the chat. A sudden, formal request can be distracting. A quick message explaining why you'd like a copy of the recording is a professional courtesy that goes a long way.
On that note, hosts can also enable a recording consent disclaimer for all attendees. This is an automated pop-up that lets everyone know the session is being recorded, which is a fantastic way to maintain transparency and respect everyone's privacy. For more detail on how data is handled, you can check out our privacy policy.
Making Your Zoom Recordings Genuinely Useful
Just hitting the record button is easy. But turning that recording into a professional asset that people actually want to watch? That takes a little more thought. Let's walk through a few practices I’ve learned over the years to capture high-quality audio and video, stay organized, and handle the important legal and ethical stuff with confidence.
First things first: consent. Before you do anything else, you absolutely must tell everyone on the call that they are being recorded. This is more than just good manners; depending on where you and your participants are, it can be a legal necessity.
A simple, upfront announcement works best. I usually say something like, "Heads up, everyone, I'm going to record this call so we have a record and for anyone who couldn't join us today." It's clear, transparent, and sets the right tone.
Getting the Audio and Video Just Right
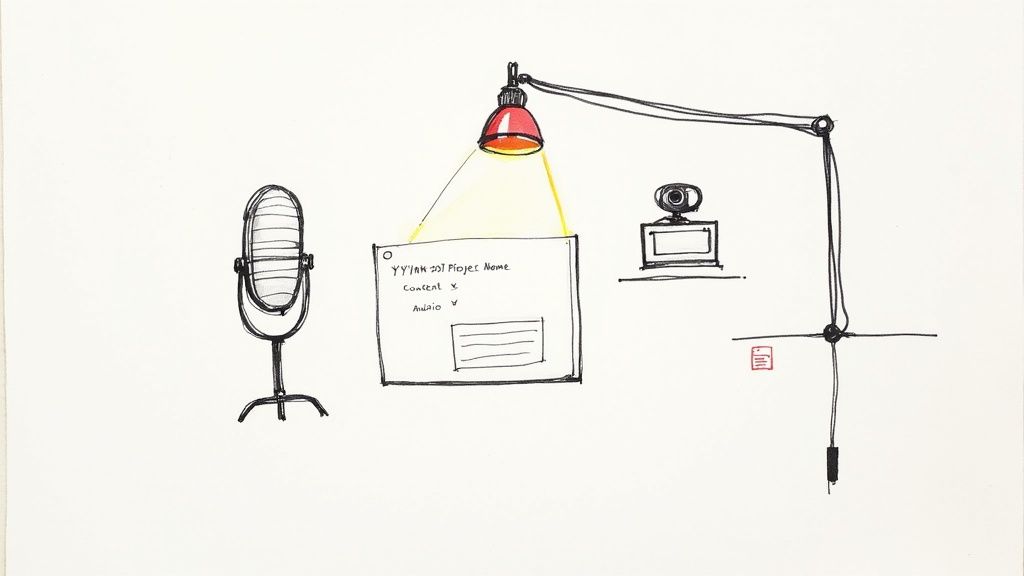
Nothing tanks a recording faster than bad audio. Your laptop's built-in microphone might be convenient, but it's notorious for picking up every keyboard tap, fan whir, and echo in the room.
The single best investment you can make for better sound is an external USB microphone. You don't need a high-end podcasting setup—even a basic model will make your voice sound dramatically clearer and more professional.
For video, lighting is everything. Again, you don't need fancy equipment. The easiest trick is to simply face a window. Natural light is your best friend. The one thing to avoid at all costs is sitting with a bright window behind you, which instantly turns you into a shadowy figure.
Smart File Naming and Storage Habits
Trust me, you don't want a folder filled with dozens of files named "zoom_0.mp4." That's a surefire recipe for a massive headache later. A simple, consistent naming convention can save you so much time.
I’ve found this format works wonders: YYYY-MM-DD_Project-Name_Meeting-Topic
For example, a file named 2024-10-26_Project-Phoenix_Weekly-Sync tells you everything you need to know at a glance. Your files will also sort themselves chronologically, making them incredibly easy to find.
Managing where you keep these files is just as crucial, especially if you're saving them locally and eating up your hard drive space.
Be Ruthless: Regularly go through your recordings. If you don't need it anymore, delete it.
Archive Smart: For older recordings you need to keep, move them to a dedicated cloud storage service to free up local space.
Use AI to Shrink Your Footprint: Tools like Notize AI can create detailed transcripts and summaries. This often means you can keep the text-based insights—the most valuable part—and get rid of the massive video files. If you're looking for more ways to improve your content workflow, the Notize AI blog has some great articles.
By making these simple practices a habit, you’ll ensure every recording is clear, professional, and easy to find. They stop being just video files and become genuinely valuable assets for your team.
Turning Recordings into Actionable Insights
So, you’ve hit "stop" and your Zoom recording is saved. What now? The raw video file is a great starting point, but let's be honest, nobody has the time to re-watch an hour-long meeting just to find a single key decision or action item. The real magic happens when you turn that long conversation into something your team can actually use.
The first, and most important, step is to get an accurate transcript. By running your recording through an AI-powered tool, you instantly convert all that spoken audio into a searchable text document. Suddenly, that static video file becomes a dynamic resource you can actually dig into.
But a wall of text isn't much better than a long video. The next leap is using that same AI to make sense of the conversation. It can pull out the main topics, create a bite-sized summary, and even identify who agreed to do what by when.
A Practical Post-Recording Workflow
Think about finishing a major client strategy session. Instead of spending the next hour deciphering your scribbled notes, you could have a perfectly formatted summary in your inbox within minutes. This isn't science fiction; it's a workflow you can set up today.
Here’s what that looks like in practice:
Upload Your File: Just drag and drop the Zoom recording into an AI platform.
Get the Transcript: The system gets to work, automatically converting the audio into accurate text.
Let AI Analyze: It then sifts through the transcript, pinpointing key themes and action items.
Receive Your Summary: You get a clean, bulleted list of the meeting's most important takeaways.
The initial recording is just about capturing the raw data. The real value comes from feeding that data into a smart system for processing and analysis.
This shift from tedious, manual review to automated insight is a complete game-changer. It frees up your team to focus on executing the plan, not spending hours just trying to remember what the plan was.
A tool like Notize AI handles this entire process beautifully. You can upload your Zoom files and get back concise summaries and clear action lists that keep your projects from stalling. If you're tired of meetings that lead nowhere, it's worth exploring how AI can organize your meeting content and turn talk into tangible action. What used to be a painful manual task now takes just a few minutes.
Common Questions About Recording Zoom Meetings
https://www.youtube.com/embed/pv0PFyYbxV8
Even when you feel like you've got the process down, a few questions always seem to pop up when you start to record a Zoom meeting. Let's tackle some of the most common ones I hear all the time.
One of the biggest little panics is losing a recording. If you saved it locally and the folder didn't pop up right away, don't worry. Just head over to your computer's "Documents" folder. You'll find a "Zoom" folder in there, with every session neatly filed away by date and time.
Why Is There a Recording Notification?
You've probably noticed that little red "Recording" indicator that appears at the top of the screen. That's a non-negotiable feature from Zoom designed for transparency and privacy.
It automatically lets everyone in the meeting know they're being recorded, which is essential for building trust and ensuring consent. As the host, you can't turn this off, and that's a good thing. It keeps everything out in the open.
Key Takeaway: If someone on the call can't see the notification, just have them look at the top-left corner of their Zoom window. It's a small but constant visual cue that stays there for the entire recording.
Another frequent question revolves around quality. Ever finish a recording and find the video is choppy or the audio just doesn't line up? Nine times out of ten, a poor internet connection is the culprit, especially for cloud recordings that depend on a stable upload.
For any meeting you can't afford to mess up, I always recommend plugging directly into your router with an Ethernet cable. It’s far more reliable than Wi-Fi.
Ready to turn those video files into something truly useful? With Notize AI, you can get automatic transcriptions, summaries, and a clear list of action items in just a few minutes. Stop wasting time re-watching entire meetings and start putting that valuable information to work. Find out how at https://notize.ai.
How to record zoom meeting: A Practical Guide